How to Check Trail Conditions Before Hiking (Stay Safe Outdoors)
A beginner-friendly guide to checking trail conditions, reading reports, and preparing for changing terrain before you hit the trail
TL;DR — Trail Notes
- Checking trail conditions helps prevent avoidable risks
- Weather, terrain, and recent reports affect safety
- Trail conditions can change quickly with elevation and location
- Reliable trail condition reports provide current updates
- Preparation improves decision-making before starting
- Awareness helps hikers stay safe before hitting the trail
Why Checking Trail Conditions Is Critical Before You Hike
Most problems on the trail don’t start on the trail—they start before you go. Many hikers underestimate how quickly conditions can change, especially when weather, terrain, and elevation all interact at once. What looks like a simple hike on paper can turn into a much different experience depending on current conditions.
Starting a hike without checking conditions can turn a simple trip into a dangerous situation within minutes.
Trail conditions aren’t just about the surface under your feet. They include everything from weather patterns and recent rainfall to water crossings, visibility, and how heavily an area has been used. Even a well-known route can feel completely different depending on recent changes.
Checking current trail conditions before you go helps you prepare for the unexpected. It allows you to adjust your plan, choose the right gear, and make better decisions before you ever step onto the trailhead.
This guide will show you how to check trail conditions, where to find reliable reports, and how to use that information to stay safe and in control outdoors.
What Trail Conditions Actually Include
When people think about trail conditions, they often focus only on whether the ground is dry or muddy. In reality, conditions include multiple factors that affect how safe and stable the environment is.
Terrain plays a major role. Surfaces can range from loose rock and packed dirt to wet leaves or uneven ground, each affecting traction differently. Water crossings add another layer of complexity, especially after rain, when depth and flow can change quickly.
Visibility is another important factor. Fog, low light, or dense tree cover can make it harder to see hazards ahead, increasing the risk of missteps. In some areas, sections of the path may be less clearly marked, making navigation more difficult.
Recent reports also matter. Information from park services, ranger stations, or other hikers can highlight hazards like erosion, debris, or icy patches that aren’t obvious at first glance. These updates help you understand how the environment is behaving right now, not just how it usually feels.
All of these elements combine to shape how safe and manageable the terrain is at any given time.
This becomes even more important when multiple changing trail conditions are present at once.
How Weather and Elevation Change Trail Conditions
Weather plays a major role in how an environment behaves, especially as you move through different elevations. Conditions that feel stable at lower elevation can shift quickly as you climb, where cooler air, wind exposure, and changing weather patterns begin to affect the surface.
Elevation gain increases the likelihood of sudden shifts. Temperatures often drop as you move higher, and exposed areas near the treeline can experience stronger wind and faster weather changes. In contrast, lower elevation sections may stay warmer, wetter, or more sheltered depending on the terrain.
Weather can change quickly in these environments. A clear sky can give way to clouds, rain, or even severe weather with little warning. These shifts affect traction, visibility, and how stable the ground feels underfoot.
Understanding how elevation and weather interact helps you anticipate what’s ahead instead of reacting to it. Paying attention to forecast details and recent updates allows you to plan more effectively and avoid unexpected hazards.
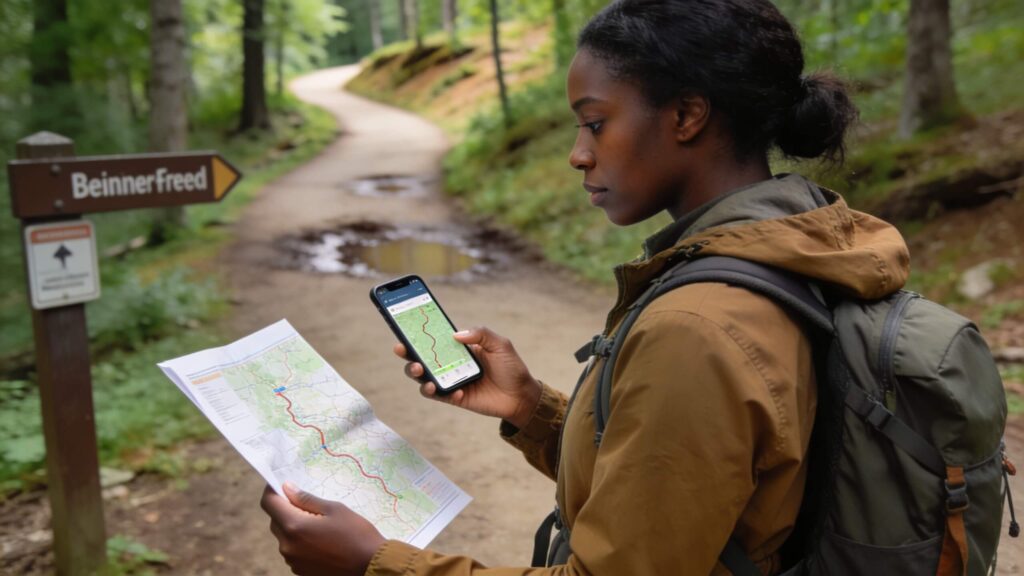
Where to Find Accurate Trail Condition Reports
Reliable information is one of the most important tools you have before heading out. Instead of guessing, use sources that provide current conditions based on recent activity and verified updates.
Trail conditions reports can be found through platforms like AllTrails, where recent trip reports from other hikers highlight what they experienced. These updates often include details about mud, water crossings, visibility, and other hazards that may not appear on maps.
Official sources are even more valuable. The National Park Service and local ranger stations provide updates based on ongoing monitoring and trail maintenance. Visitor centers can also offer real-time information about closures, hazards, and weather-related changes in specific areas.
Community-based updates can add another layer of insight. Local trail groups and online forums sometimes share recent conditions, especially in areas that change quickly due to weather or heavy use.
Combining multiple sources helps you build a clearer picture of what to expect, allowing you to prepare more effectively before you go.
How to Read and Interpret Trail Conditions
Reading a report is one thing—understanding what it actually means is what keeps you safe. Words like “wet,” “muddy,” or “icy” can vary depending on location, recent weather, and how heavily an area has been used.
For example, a note about muddy ground might mean light surface moisture in one area but deep, unstable sections in another. Similarly, icy patches can range from thin, manageable spots to areas that require traction like crampons to move safely. Mentions of snow depth or frozen sections should be taken seriously, especially in higher elevations where conditions can change quickly.
Hazards are often hidden in simple language. Terms like “eroded,” “washed out,” or “water crossings” can signal increased risk, especially after heavy rain or rapid weather shifts. Learning how to interpret these signals helps you make better decisions before you encounter them in real time.
The goal is to read between the lines. Reports don’t just describe conditions—they point to how the environment is behaving and where it may become unsafe.
This becomes even more important when loose surfaces or leaf-covered ground reduce traction and hide hazards. – Leaf SAT bridge
Final Checklist Before You Start Your Hike
Before heading out, a simple checklist can make the difference between a smooth experience and a risky one. The goal is to be prepared, not reactive, so you can adjust before small issues turn into bigger problems.
Start by reviewing the latest updates and making sure you understand what they mean for your route. Check the weather forecast, confirm access points, and look at trail maps so you know where you’re going and how to adjust if needed. Planning accordingly helps you avoid unnecessary risk and stay in control.
Next, focus on your gear. Bring the right gear for current conditions, including extra layers, proper footwear, and items from the 10 essentials. These basics support safety and give you flexibility if conditions change or your timeline shifts.
It’s also important to consider your fitness level and experience. Choosing a route that matches your ability makes it easier to manage unexpected challenges and reduces the likelihood of getting lost or overwhelmed.
Taking a few extra minutes to prepare before you go can help you stay aware of your surroundings and ready for the unexpected.
This becomes even more effective when combined with everything you’ve learned about terrain, weather, and changing conditions.
Conclusion — Stay Safe by Checking Trail Conditions Before You Hike
Checking trail conditions before you hike is one of the most important safety habits you can build as a hiker. Current conditions, weather, and terrain all influence how the trail will feel once you start moving. Taking time to always check before going out helps you avoid unnecessary risk and stay prepared.
The most effective approach is to combine multiple sources. Reviewing trail guides, recent trail info, and updates from places like the Appalachian Mountain Club or local ranger stations gives you a clearer picture of what’s happening.
Preparation goes beyond information. Bringing the 10 essentials, wearing proper hiking clothing, and knowing how to use your gear all play a role in staying safe. Whether you’re visiting a state or national park, exploring a national forest, or heading into backcountry areas, planning around elevation, water crossings, and terrain helps you make better decisions.
It’s also important to match the route to your experience. Choosing a different trail when conditions are poor—especially in areas like the White Mountains of New Hampshire or along routes such as the Pacific Crest Trail—can make a major difference in safety. In more advanced environments, factors like snow and ice, avalanche forecast updates, or the need for crampons and traction should never be overlooked.
At its core, staying safe outdoors comes down to awareness, preparation, and decision-making—an approach that aligns with Lafleur Media’s mission to make the great outdoors more accessible and empowering for everyday hikers.